Building an Arduino Timer ...
Building an Arduino Timer
January 31, 2026 • 10 min read • Beginner
Decided to do something different today. I’ve had this Arduino starter kit lying around for a little while now and today just seemed like a good day to open it up and have a go. I also have a goal of building a physical engineering tool thats useful (this year). So this is the first milestone to achieving that I suppose.
First up, this kit contains everything I needed which was fantastic. The 16x2 LCD screen, buttons and all the supporting things like the breadboard, potentiometer, wires, resistors etc.
First step was to get the screen working just by itself. This took way more time than I would’ve liked because I had a poor connection on one of the wires and the screen was doing all sorts of funky stuff. Anyhow, if you give Arduino’s a go, make sure you put all the wires in far enough and make sure none of them are touching!
So we have some text appearing on the screen now, which is cool and all but I wanted it to be dynamic so I added some buttons. This added added two things:
• Buttons (obviously) and tracking button state in the loop
• The lcd.print() functions now need to happen in the loop function
Simple enough, but the loop runs continuously so the screen just flashes like a million times. Things that fixed all the flashing was setting a slight delay at the end of the loop and also, instead of running lcd.clear() using lcd.print(” “). Notice how many spaces? 16. Right, so we actually just re-write the line which means the screen is never cleared. Made all the difference.
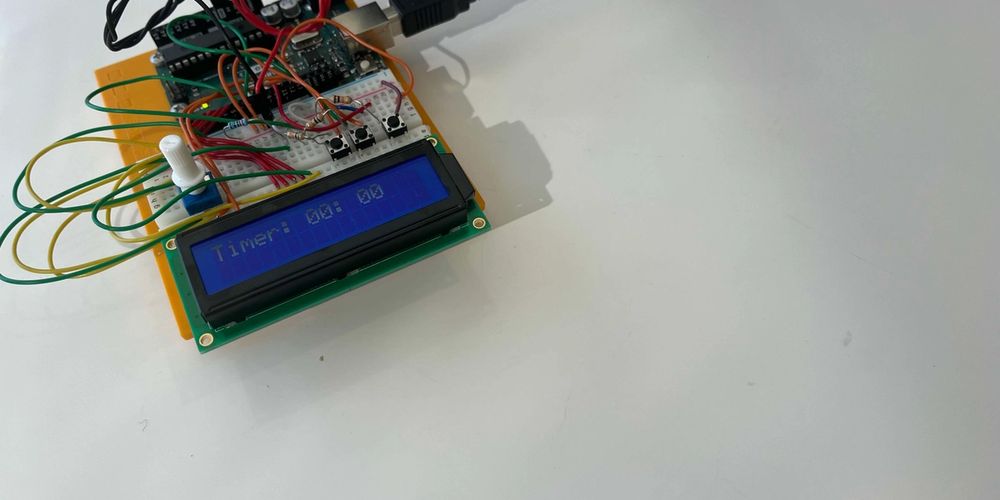
Adding some buttons and writing up the code I got something like the following:
Finally, some interactivity. Now I could press the previous and next buttons and change the text on the screen. This was nice and all, but I wanted to be able to build something kind of useful (even i’m never going to use this in it’s current state). A timer seemed like something achievable and extremely simple in web dev. How hard could it be in embedded? Turns out, kind of hard.
The more I added to the board, the more weird issues I was getting and I had to be super careful not to knock it and check the wires weren’t touching other wires and letting the smoke out and all that. I built it with a buzzer that when the time ran out would emit a little buzz, but it was causing some kind of overload on the screen (I suspect it was causing a short because the wires are so close in that spot). So the codes there, but I took the buzzer off in the end and it works just fine.
Some other takeaways were that Arduino C++ includes some popular libs by default which was helpful, but it also uses C++ 11 which is not ideal since I think were up to C++ 23 now? Also, If I had more space on the bread board I would’ve added a potentiometer on the earth of the buzzer so that I could’ve adjusted the volume.
It was really nice to jump back into C++ again after the summer off from uni. This project really got me feeling excited about building physical projects though and I almost went out and bought a WIFI board so I could connect it to an API and do some fun web IOT-ish things with it. Definitely planning my next project. Thinking something along the lines of a desk utility tool.
As always, thanks for reading!